Products You May Like
For a long time, I diligently applied nail strengtheners to my brittle nails in the hope that they would grow long and strong. When that didn’t make an immediate different, I focused on press-on nails to give me an instant mani. Finally, it hit me: all those long-nailed inspo pics I saved on my Pinterest weren’t natural–the models had acrylic nails.
What are acrylic nails?
“Acrylic nails are a type of nail enhancement, specifically a combination of a liquid monomer and a powder polymer that form a paste that is bonded to the natural nail. When combined, they harden on their own to create the enhancement,” says NYC-based nail artist Julie K. A great set of acrylic nails can last around a month, depending on your personal rate of nail growth. And while they will cost more than a typical mani, it also means you get more bang for your buck.
How are acrylic nails applied?
“When getting acrylics, the nail technician will prep your nails, manicure, push everything back then lightly remove the shine from your nail,” instructs Julie K. “When the technician removes the shine, it is crucial to try not to remove it too rough. Instead, it should be removed on a light to medium level for the product to stick. The nail technician will then either apply a plastic tip using nail adhesive or use a form to build the acrylic on top of it. It then takes about three minutes for the actual product to cure. You can tell when it’s cured if you can hear it tap. After three minutes, then it’s okay to file and then polish. One important thing to note is that acrylic shrinks slightly over the next 24 hours as it’s finishing to hardening. It is normal for your acrylic nails to feel a little bit tight for the next 24 hours as it does that.”
In my personal experience, it takes roughly an hour in the salon, but the timing also depends on what you’re walking in with. If you need a set of acrylic tips to be removed, the process may take longer.
What is aftercare like?
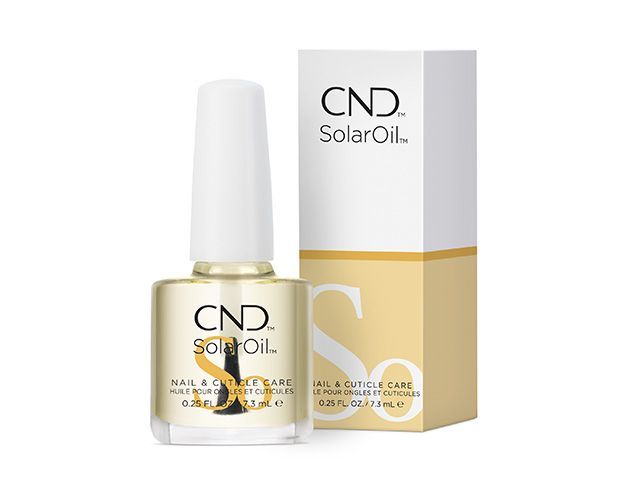
“When considering aftercare, any nail enhancement needs cuticle oil to keep the skin and everything supple,” adds Julie K. “I recommend CND SOLAROIL because [it] is designed to absorb liquid and powder enhancement. The oil prevents the nail from lifting and chipping when applied to the surface of the nail. I also recommend applying the oil under the free edge of the nail because it keeps the natural nail hydrated so that it doesn’t curl away from the enhancement, which is why most people get lifting from the corners because the nail is curling in. After all, they’re dry. Using cuticle oil prevents that.” Still searching for your favorite product? Check out our list of must-have cuticle oils.
How do you remove acrylic nails?
“The safest way to remove an acrylic or dip manicure at home is by using what I call the ‘soak and roll’ method,” says Julie K. These are the tools you will need:
- 100 percent Pure Acetone
- 2-3 coarse nail files (100/180 grit)
- 1 padded buffer
- 1-2 orangewood sticks
- 1 medium-grit nail file (220/320 grit)
- 1 fine grit nail file (400/600 grit)
- Cuticle oil
- A glass or ceramic bowl (never plastic!)
Next, follow these steps:
- First, soften the edge of your coarse files by rubbing them on the side of another coarse nail file so that you don’t cut your cuticles.
- Using the coarse, 100, or 180 grit file, file as much of the product off as you can–about 80 percent. This is important because it cuts down soaking time significantly. (Expert tip: leaving the surface extra rough will allow the acetone to penetrate easier. Also, never clip your enhancements because they will crack and cause damage to your nail!)
- Apply cuticle oil to the cuticle area and underneath the free edge. Use a dropper or Q-tip instead of the brush to stay germ-free.
- Pour about 3 inches of acetone into your bowl and place your hand in it. Beauty hack: do one hand at a time so you can text or snack.
- Cover your soaking hand with a towel to prevent evaporation and allow the acetone to work faster. (Another important tip: never use actual heat—acetone is very flammable!)
- When the acrylic is softened after 10-15 minutes, gently nudge it towards the tip of the nail using an orangewood stick (not metal). Never push towards the cuticle or against the grain just after they’ve been soaking in acetone.
- Use your medium grit file to roll the softened acrylic off the nail until it doesn’t roll anymore.
- Re-apply the cuticle oil and re-soak the nails. Repeat until all acrylic or dip is gone.
- Finish by lightly smoothing nails with your fine grit file.
- Apply cuticle oil to rehydrate your nails and skin, and you’re done.
How can you keep your nails healthy while wearing acrylics?
Take it from me, getting acrylics back-to-back can take a toll on your nail health. For that reason, it’s important to take certain precautions. “If you’re concerned about nail health, make sure that you go to a reputable nail technician,” says Julie K. “It’s important to know that when you’re getting your nails done, you shouldn’t see any red lines or what we like to call rings of fire. What that means is that the tech might be getting too close to the skin basically and is getting deeper into the nail bed, which is closer to the blood supply, and you can see the red color. Also, make sure you’re not ripping your acrylics off when it’s time for a new set. Any type of nail enhancement will work best on a healthy nail. If you rip them off yourself, you end up taking layers of your nail bed with them. That means your next set won’t last long enough because it doesn’t have much to stick to.”

Beauty Commerce Writer
Tatjana Freund is ELLE.com’s Beauty Commerce Writer, covering makeup, skincare, and haircare products and trends. Previously, she worked at Marie Claire. She has bylines with Town & Country, Good Housekeeping, Harper’s Bazzar, and more. Tatjana is an advocate for Latinx representation in the beauty industry. Her work has been featured on the Drew Barrymore show. She’s a fan of whiskey neat, podcasts that give her nightmares, and one time Zoë Kravitz laughed at a joke she made.


